
Connecting Honeycomb Maps to Snowflake using a Programmatic Access Token (PAT)
Honeycomb Maps can authenticate to Snowflake using a Programmatic Access Token (PAT). In this model, you generate a token in Snowflake, and then save it as part of the connection settings in Honeycomb Maps. When Honeycomb Maps connects to Snowflake (for example, when loading data for a map), it presents the saved token (PAT) to show that it is allowed to access data.
Programmatic Access Tokens are a user-independent form of authentication, because they do not verify or depend on the identity of the end user. Multiple users, or public users for a shared map, may use a connection that uses one PAT.
There are two steps to set this up:
- Create a programmatic access token (PAT) within Snowflake
- Configure a connection in Honeycomb Maps that uses the PAT
Creating a PAT in Snowflake
First, you will need to create a Programmatic Access Token within Snowflake. Snowflake has detailed documentation here: https://docs.snowflake.com/en/user-guide/programmatic-access-tokens.
This will involve:
- Creating a service user
- Creating a network policy that restricts access to Honeycomb Maps' published IP -
54.198.161.240 - Attach the network policy to the user
- Grant a role to the service user, allowing them to view data
- Generate the programmatic access token
Here are example SQL commands
-- Create a service user and generate a PAT for them
-- ============================================
-- 1. Create the user
-- ============================================
CREATE USER IF NOT EXISTS honeycomb_maps_service_user
  TYPE = SERVICE                     -- use SERVICE for an app/service account (not a human login)
  DEFAULT_ROLE = READ_TEST_DATA
  COMMENT = 'Service user for Honeycomb Maps application';

-- ============================================
-- 2. Create (or reuse) a network policy
--    Restrict to the published IP address that Honeycomb Maps uses
-- ============================================
CREATE NETWORK POLICY IF NOT EXISTS honeycomb_maps_network_policy
  ALLOWED_IP_LIST = ('54.198.161.240')
  COMMENT = 'Restricts honeycomb_maps_service_user to known IP';

-- Attach the policy to the user
ALTER USER honeycomb_maps_service_user SET NETWORK_POLICY = honeycomb_maps_network_policy;

-- ============================================
-- 3. Grant a role to the Honeycomb Maps service user, so it can read data.
-- This role should be tightly scoped with minimum permissions required.
-- ============================================
GRANT ROLE [insert role name here] TO USER honeycomb_maps_service_user;

-- ============================================
-- 4. Generate the programmatic access token
-- ============================================
ALTER USER IF EXISTS honeycomb_maps_service_user
  ADD PROGRAMMATIC ACCESS TOKEN honeycomb_maps_access_token
  ROLE_RESTRICTION = 'READ_TEST_DATA'
  DAYS_TO_EXPIRY = 365
  COMMENT = 'Token for Honeycomb Maps to access Snowflake';
Configure a connection in Honeycomb Maps
- Log into Honeycomb Maps at app.honeycombmaps.com, or your custom business URL.
- Go to the 'Connections' page. If you are using the business version of Honeycomb Maps you must be a Honeycomb Maps Admin to configure connections.
- Click on 'Set up a new connection', then click on 'Snowflake'. For 'Authentication method', select 'PAT'.
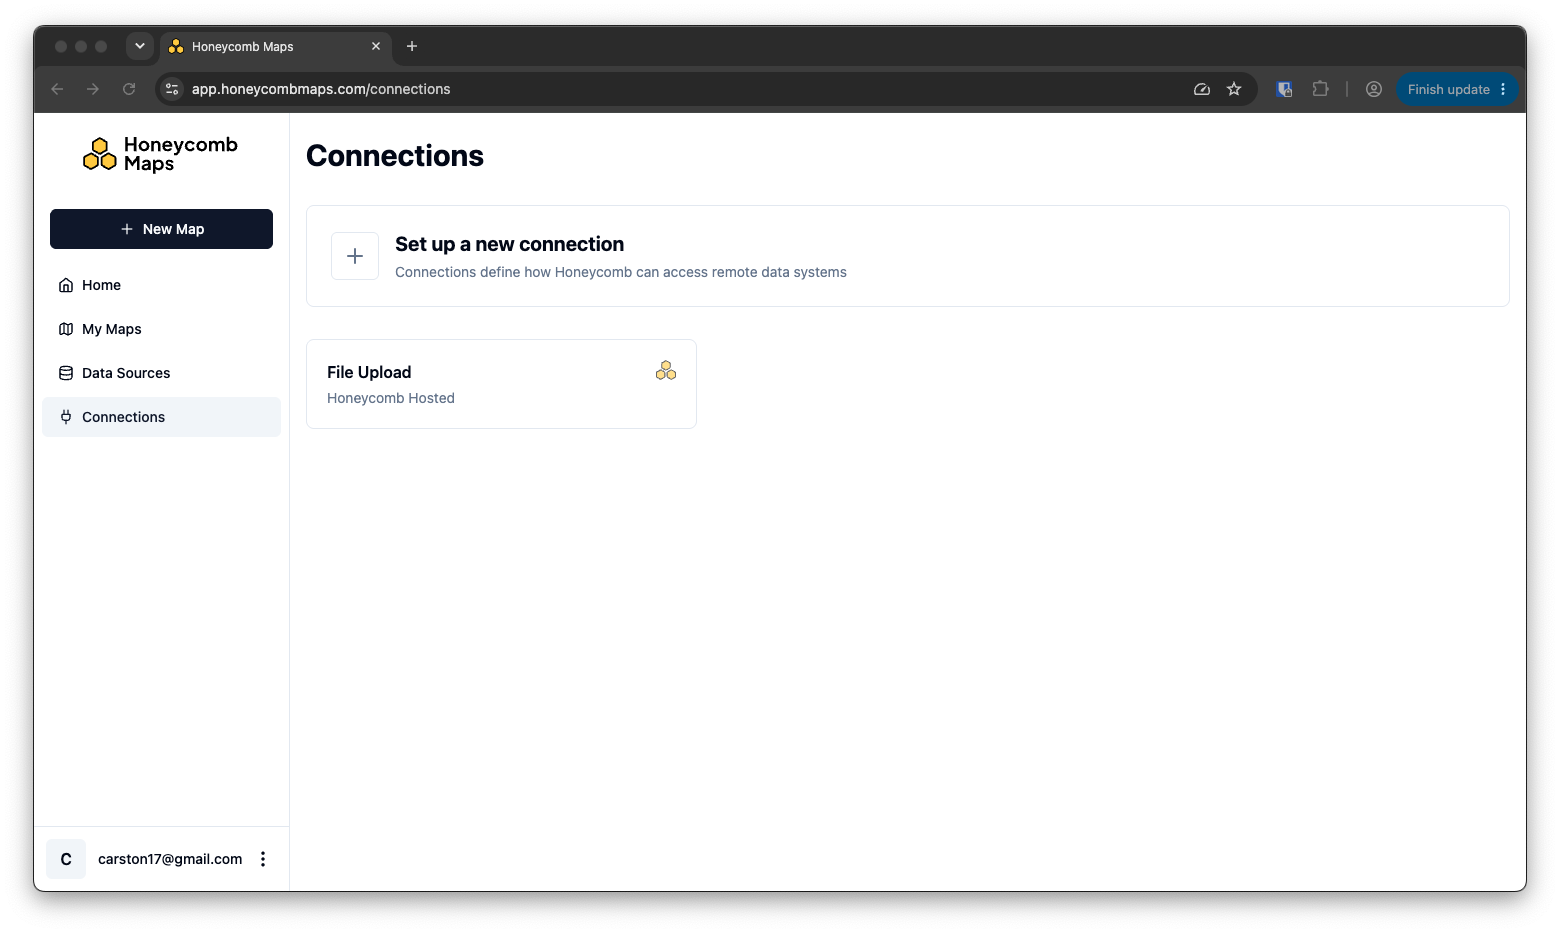
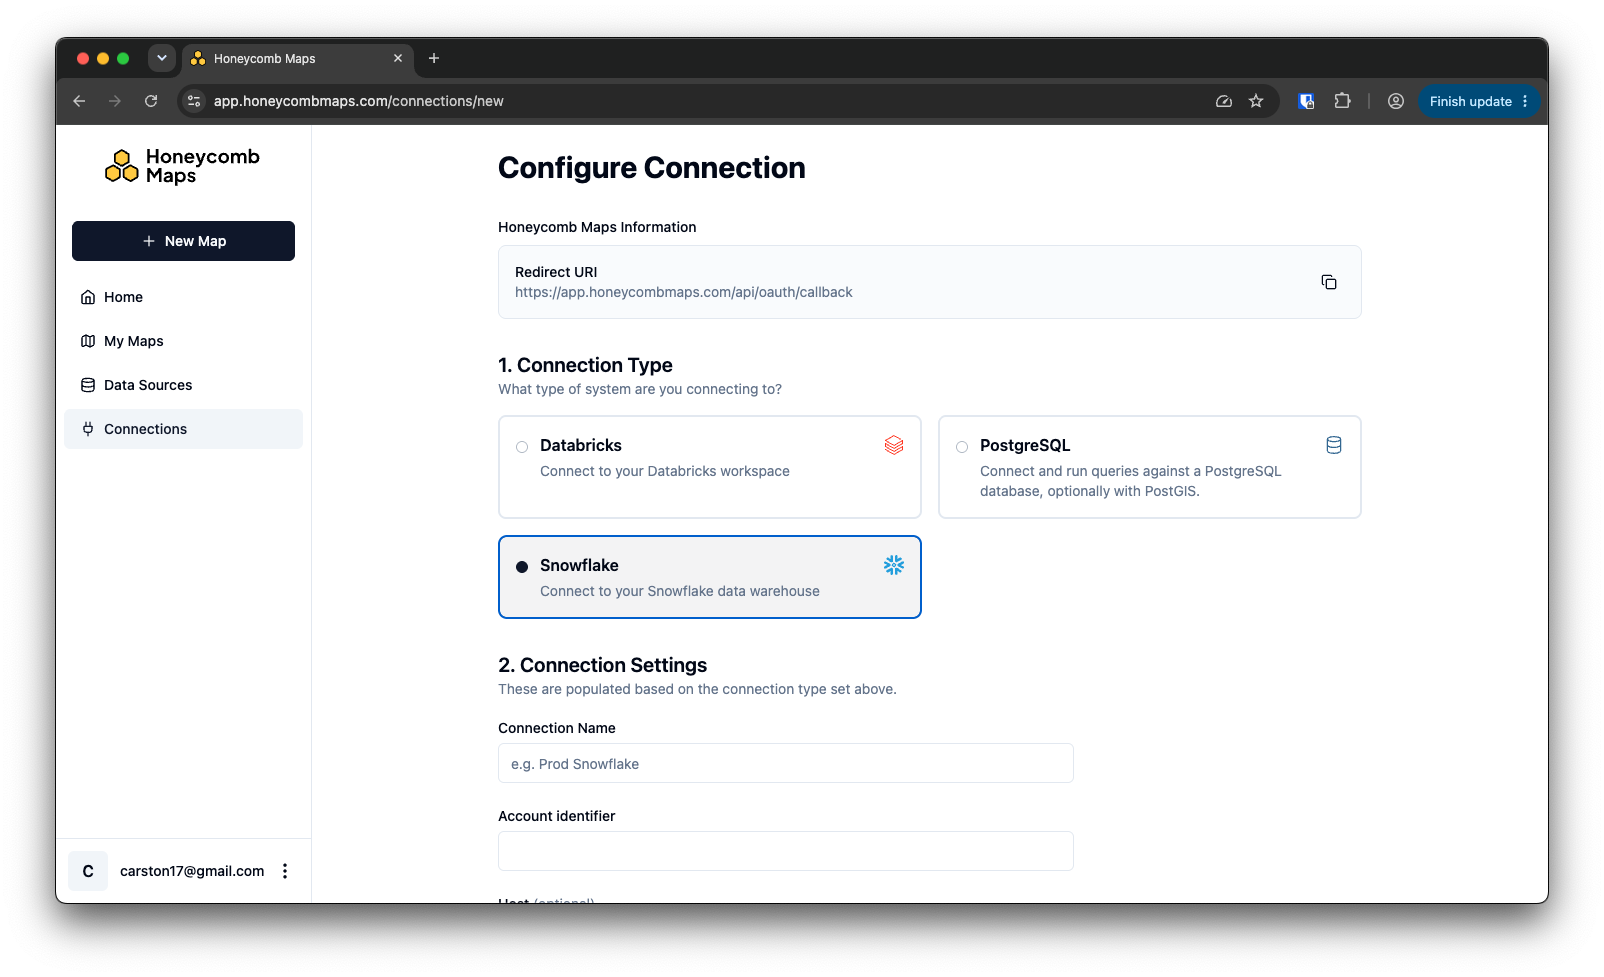
Fill in the following information:
| Field | Required for PAT Authentication | Details |
|---|---|---|
| Connection Name | Yes | A descriptive name for the connection. It will be shown to users within your organization. |
| Account Identifier | Yes | You can find your Snowflake account identifier in the bottom-left corner of the Snowsight web interface by clicking your account name and selecting Connect a tool to Snowflake. |
| Warehouse | Yes | The name of the Snowflake warehouse that should be used when Honeycomb Maps fetches data. |
| Database | No | The default Snowflake database that Honeycomb Maps should use. |
| Schema | No | The default Snowflake schema that Honeycomb Maps should use. |
| Role | No | The role that should be used when connecting. The role must be granted to the service user. |
| User | Yes | The name of the user the PAT was issued for. |
| Programmatic Access Token | Yes | Copy and paste this from Snowflake. |
- Click on 'Save Connection'. After a moment, you should see the connection details, with the Status showing as 'Connected'. If there was an error connecting to Snowflake, it will be shown under 'Status'.
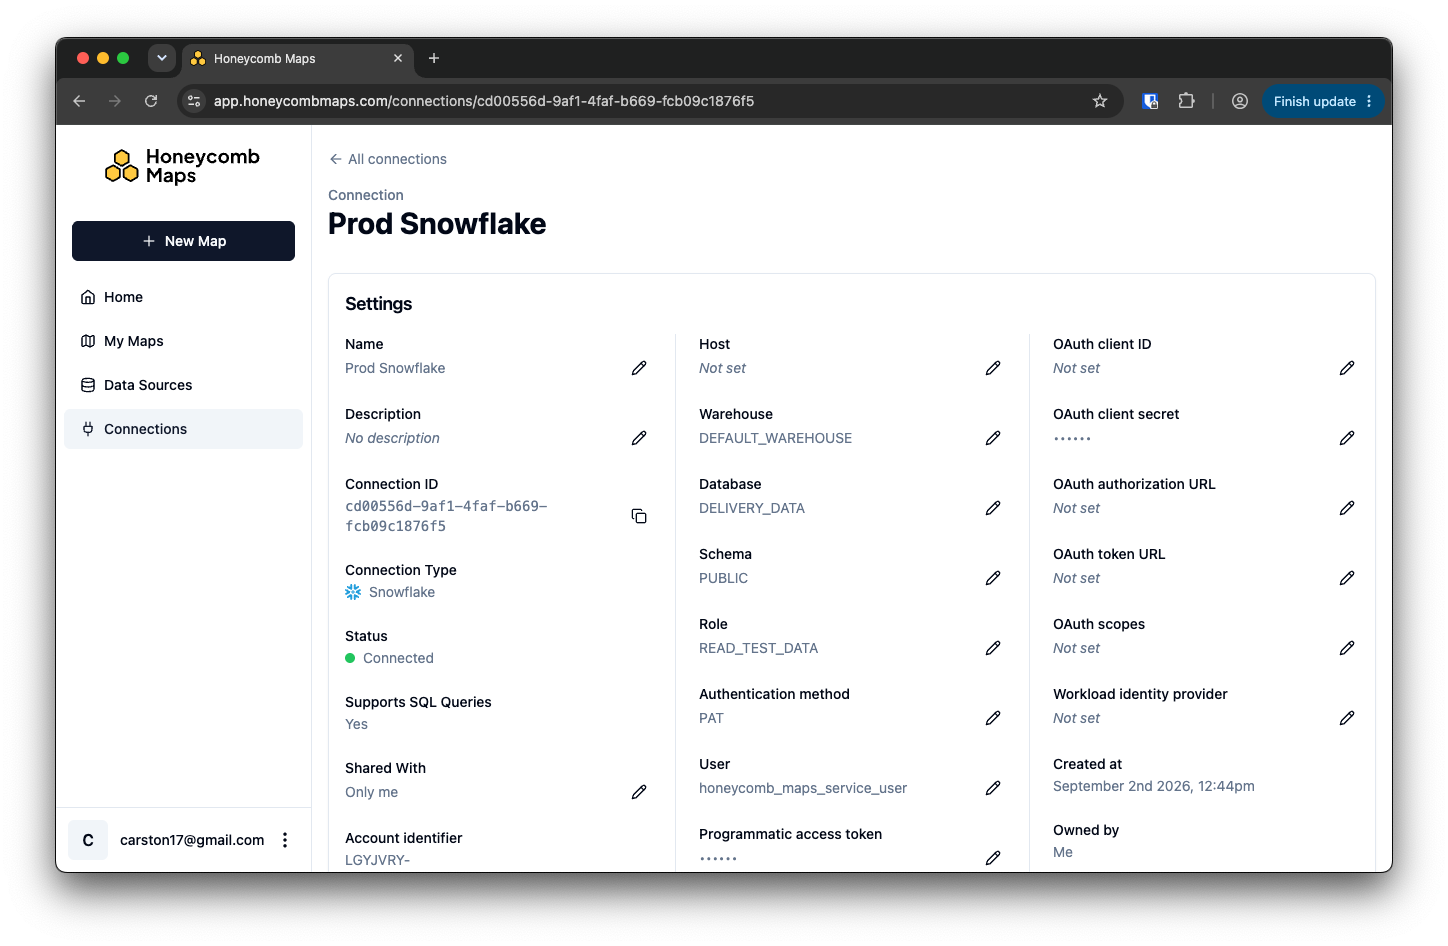
- Now that the connection is active, the next step is to create a data source that uses this connection. Click on 'Data Sources' on the left sidebar, then on 'Add a new data source'. Select the connection you just configured, then enter a SQL query that will be used to fetch data from Snowflake.